Spot Dyeing

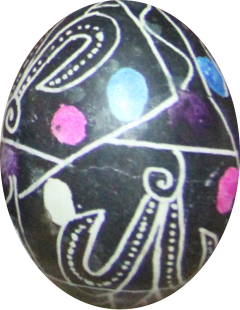
Spot dyeing is a technique to apply small amounts of color to an egg. It is used when a little bit of an out-of sequence color is needed. In traditional pysankarstvo, there are two situations where this technique was commonly used:
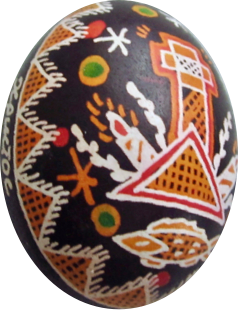
1. To apply small areas of green onto a yellow egg shell. This is a common practice in the Carpathian regions of Ukraine, where “ox eyes” (a yellow circle with a green center; above, left) are an often used motif, as are small green accents. The folk pysanky below, from the Pokuttian villages of Trostianets and Illintsi, show examples of these ox eyes.


2. To apply small areas of pink, blue or purple onto a white egg shell. This is often done in many parts of Hutsulshchyna, Bukovyna (top of the page, right) and Pokuttia. The pysanky of Chornyi Potik (below) are characterized by their use of this technique.


The technique itself is quite straightforward. The area to be colored is outlined in wax, on a white or yellow shell. The dye is then directly applied to shell, using a small paintbrush or other tool (Q-tip, fiber brush, matchstick, etc.). In this photo from Chornyi Potik, the pysankarka is using what appears to be a sharpened wooden dowel to apply pink dye:

The dye is left on for a short time, and then the excess dye is dabbed off with a tissue or cloth. The dyed area is allowed to dry fully, and then covered in wax.
You can see an example of spot dyeing in the green areas of this pysanka from Trostianets:

Sometimes, particularly with green, the dye is applied to the shell over a small area, allowed to dry as above, and the design then written over the now green area. Usually this is done to produce simple green dots, and is most often seen in modern or diasporan pysanky. An example is this pysanka design from UGS:


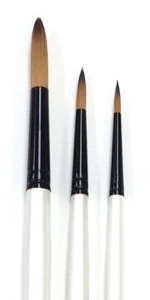
All sorts of tools can be used to apply the dye. A fine tipped paint brush is the easiest and most straightforward. I prefer to use a fiber brush (right) to do traditional spot dyeing:


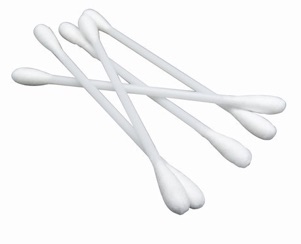
For classes, Q-tips (cotton tipped applicators) are the simplest solution. They are also more useful for modern spot-dyeing, where the dye is applied over a larger area, rather than into a space defined by wax lines. I prefer the kind with paper stems, as they are biodegradable.

I’ve taken the colors I use to spot dye most frequently, and poured a small amount of each into a jar. It is much easier, and much less messy, to dip your applicator into a small jar than into a large dye jar. Below is one of the 2 ounce paint jars I bought at Michael’s for this purpose; the small volume and plastic lid (no rust) make it perfect. I keep these jars in a drawer in my work table.

The colors I use most frequently for spot dyeing on a white egg are: pink/magenta, purple, light blue, dark (royal) blue, and turquoise. On a yellow egg: light green.
I’ve labeled each jar, on the lid, with a silver Sharpie, so I can tell at a glance what color the dye is. I also have a set of fiber brushes, one for each color, unlabeled. Here you see my (light) green dye and applicator brush, along with an egg ready to be spot dyed:

The fiber brush is dipped into the dye, and the dye applied to the surface of the egg. When it is a large area, I brush the dye on like paint; when it is a small area circumscribed with a wax line, I put in several drops of dye, os the dye beads up.


I let the dye sit for a few minutes, and then daub it dry with a tissue. The dye should be allowed to dry fully, and then the area that has been spot dyed is filled in. If there are multiple areas, I wax in after all the dyeing is finished.
Like any other dyes, spot dyes need to be adequately acidified. The dye should take quickly and well; if not, try adding a bit of vinegar to the jar. I add vinegar to the dye every few months, or more often, if needed (e.g. if the jar has no vinegar scent, if the dyes don’t want to take well).
Back to Main Dyeing page
Back to Main Advanced Dyeing page
Back to Main Pysankarstvo page
Search my site with Google
Little bits of color.....


