“Circle” Stars

“Circle” Stars
Stars based on a circle, like this one, are a bit more difficult to draw than those based on a square, but not by much.
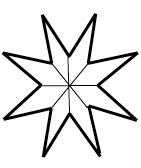
To create such a star, follow these directions:
(Note: the instructions that follow are for making the pencil guidelines for the patterns. New lines for each step are in red. Not all of these lines will be waxed in. Waxing is usually shown only in the final step(s), and the lines to be waxed – several options may be given – are indicated.)
First, you must divide your egg into sections. Use a pencil to draw these guide lines. DO NOT WAX until you have drawn all of the guide lines!
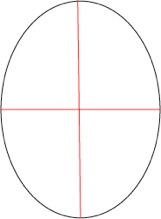
1. Using a lathe (or a good eye/tape measure), divide your egg in half
horizontally and longitudinally. The red lines here are your pencil
lines.
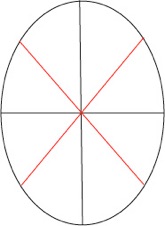
2. Now add in the lines shown, dividing each of the segments in half
at a 45° angle. This will give you your basic star division.
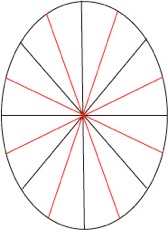
3. Divide each of the resulting segments in half with a line. You now
have 16 segments.
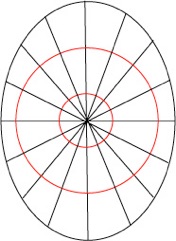
4. You will now need to draw two circles, one inside the other. The
size of the outer circle will determine the size of your star; the
size of the inner circle will determine the length of the arms of
your star. I use templates to draw my circles, or you could
measure equal distances along the lines, and then connect
the dots.
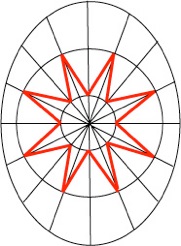
5. You are now ready to actually draw your star. It is quite easy –
draw lines from the outer circle to the inner circle, as shown.
The result should be a nicely symmetric star.
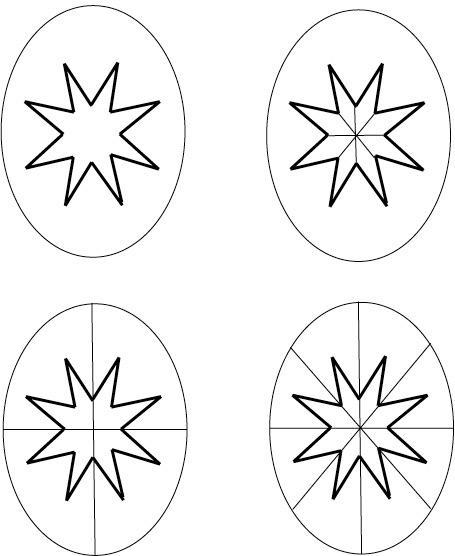
You are now ready to start writing with WAX. Which of these lines should you wax in? It depends upon what the pattern calls for. Do you want just an isolated star? Or do you want other lines as well? Depending on the design you choose, you could use this basic pattern (as above):
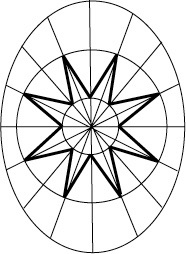
and create any of the following designs IN WAX:
As you gain experience, you may find that you can do with fewer and fewer guide lines; I use only a few straight lines and one circle, and draw the star directly in with wax. But then I’ve been making pysanky since the 1960s..... With some practice, you should be able to skip a few steps.
Shortcut
To do this, proceed in pencil as before through Step 2. Skip Step 3 above altogether, and then draw the two concentric circles as in Step 4 above. Now you need to place dots on the halfway point of the arcs of the outer circle as shown here:
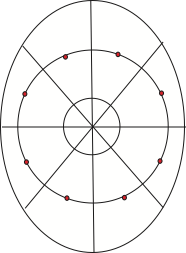
You then connect these dots to the interstices of the inner circle as shown here:
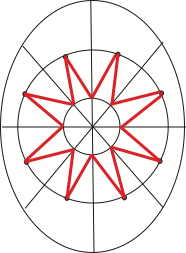
You can pencil in these lines, or write them directly with wax. As before, you get a beautifully symmetric eight pointed star, as above, but with a bit less drawing of guide lines.
16-Pointed Star
To create a 16-pointed star similar to one pictured in the photo at the top of this page, starts in pencil with Step 4 as above:
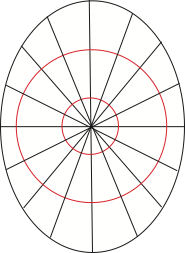
Instead of alternating the direction of the lines in each of the segments, draw all the lines from the outer circle to the inner circle in the same direction, as shown here:
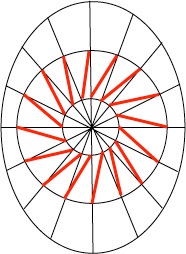
You will get a sixteen-pointed star of the “bent star” or windmill variety associated with Svaroh that, when waxed in, looks like this:
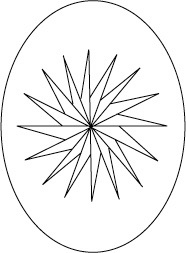
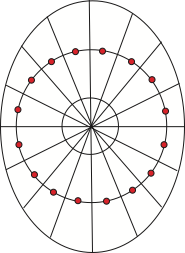
It is fairly easy to create a symmetric 16-pointed star, with “unbroken” arms as well. Start in pencil with Step 4, and add dots at the halfway point of each arc of the outer circle:
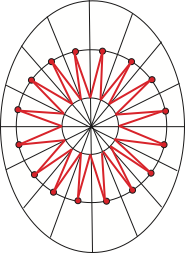
Next, connect these points to the interstices of the inner circle, as shown here:
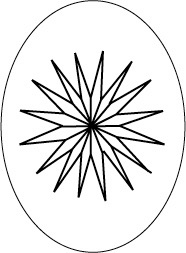
Waxing in will give you a symmetrical star like this:
Concentric Stars
You can also create concentric stars. Follow the instructions above but, in Step 4, you will need to add (in pencil) a third circle, and then, in Step 5, and draw in TWO stars:
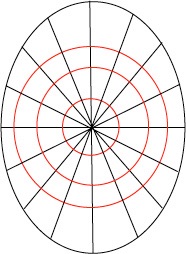
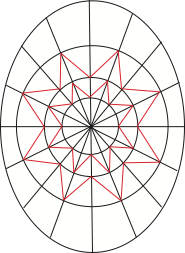
Step 4 Step 5
This will give you, depending on which lines you wax in, a concentric star similar to this:
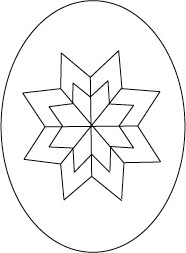
These basic instructions can also be extrapolated to create all sorts of concentric stars, windmill stars and many other variations on a simple star. Making the inner circle smaller will give you long, narrow arms; making the inner circle larger will give you more of a “rozha” or “rose star.” Use the basic steps outlined above, but modify them by adding a few extra divisions here, another circle there, and you will be able to create all sorts of wonderful stars.


(You can download the current version of this information in printable form by clicking here.)
This page updated 12-30-2011.
Back to Main Writing Pysanky page
Back to Main Pysankarstvo page
Search my site with Google
Note: All photos, illustrations and text © Luba Petrusha 2007-2012. All Rights Reserved. Reproduction prohibited without expressed consent. May contact via e-mail (link below).


