Teaching Pysankarstvo:
Demonstration
Teaching Pysankarstvo:
Demonstration

Once I have finished showing the movie and/or slideshow, I will do a quick live demonstration of our tools and set up.
First, however, I reiterate the rules of the maysternia (which I’ve included in the slides of my talk):
1.Tie back hair!!! Loose hair can easily get burned.
2.DO NOT erase! Use wipes to remove pencil mistakes. Although I cut the erasers off of all my pencils, there will be those who will try to use the remaining eraser stub. This will just smear pink eraser onto the egg and scratch its surface. Remind students to only use wipes.
3.Write with the egg on the table, not up in the air. When you are not working on your pysanka, leave it safely near the center of the table so it does not roll off. Keeping the egg on the table while working on it means that it won’t be dropped and break. Keeping eggs not in use in an egg carton in the center of the table means they won’t roll off....and break.
4.Sit with plenty of space between you and your neighbor Do not jostle other people or the table. Jostling your neighbor’s arm may cause them to drop the egg or to make a blob or mistake on his/her egg. Jostling the table may do the same.
5.WASH YOUR HANDS before starting!!!!!!!! Grease and dirt can easily get transferred to the egg’s surface, and the dye won’t take well. I remind them that, if they get dye o their hands, to wash them, as that dye can get transferred to the egg, too.
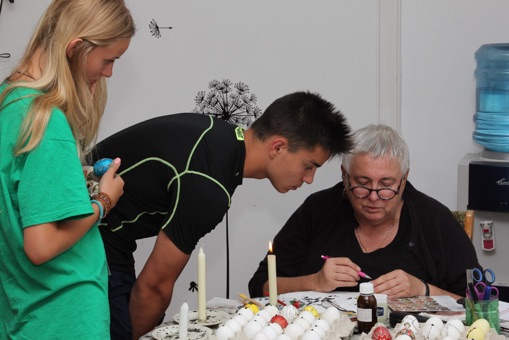
Once we’ve gone over this, I will gather the group (if small) around me, or go to each table separately (if a large group) and demonstrate how to use the patterns, pencil, styluses and wax.
PATTERNS: I will point out to them the pattern sheets available, whether in their booklets, or on tables. I will explain how the patterns work--each picture shows a stage of writing the pysanka. And I will point out where in the booklet they can find the pysanka that was demonstrated in the video--many students like to do that one as their first.

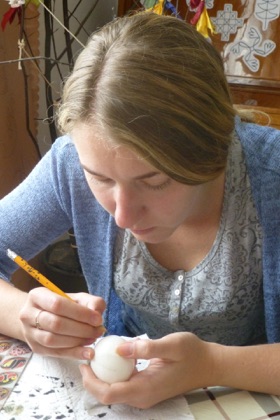
PENCIL lines: I will point out that each egg has been divided in to eight, and that they can use these guide lines to plot their pattern. I will show them how to write, lightly, with the pencil, and how to erase pencil lines with the wipes. And I will explain to them that pencil lines are just a guide, and they should draw only a few guide lines, and NOT every single detail of the pattern!

WAX lines: I will remind them NOT to light candles until they’ve finished penciling in their design and ready to write with wax. I will tell them to never take a lit candle to an unlit one to light it, but to take the unlit one to the lit one. I will remind them NOT TO PLAY WITH MATCHES, CANDLES OR WAX.
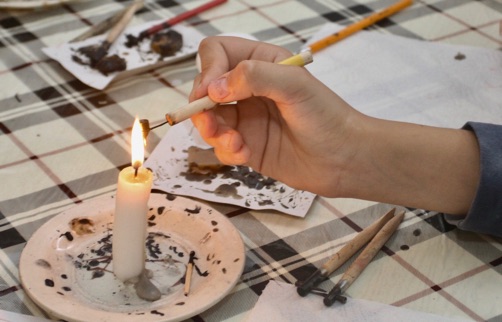
I will then demonstrate how to use the styluses, as the ones in the movie are the old fashioned cone stylus, and the ones I use here and in Ukraine usually have brass reservoirs (Delrin style):
1.Heat only the reservoir itself; do not put the dandle into the flame.
2.Count to eight slowly to allow the reservoir to heat properly the first time.
3.Scoop the wax from the edge of the piece of beeswax into the reservoir.
4.Heat the tip while counting to three slowly.
5.Test the stylus by writing on your thumb nail, the wax cardboard, or even the paper towel, to make sure the wax hasn’t overheated (it will blob if too hot).
6.Write your design on the egg. Once the wax stops flowing, heat the tip again and proceed as in #4.
7.When the wax runs out, start over by heating the reservoir and scooping up more wax.
I also tell them to bring the stylus to me if it is writing poorly, or stops writing altogether. I remind them to write their name or initials somewhere on the egg in white (kids can easily forget what their egg looked like).

And I instruct them to bring their egg to me for inspection before they go to the dye table and put it in the first dyebath. I do this for several reasons:
1.I check for cracks, and to make sure the wax plug in the drain hole is intact.
2.I have them show me their pattern, if they are using one, to make sure they are following it/haven’t missed anything.
3.I make sure they’ve written their name/initials on the pysanka
4.I discuss their planned color sequence to make sure it is possible, and that they understand the order in which the colors will be applied
5.I wipe the egg down with a large Goof Off wipe to remove any remaining visible pencil marks and smudges.
Back to Main Teaching page
Back to Main Pysankarstvo page
Search my site with Google
“Hands On” Instruction
