Wax Removal
Oil Lamp Method
Wax Removal
Oil Lamp Method

An oil lamp is simply a substitute for a candle, and is used similarly to a candle.
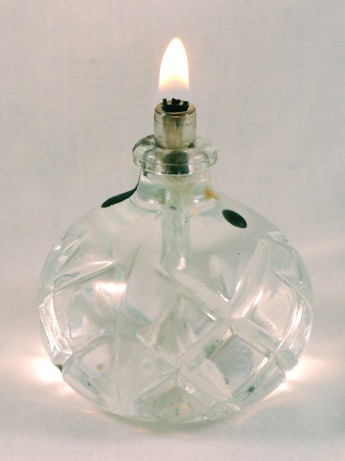
PREPARATION: Before actually using the oil lamp, you must adjust the wick to get the right flame size. Some of the larger lamps will have a small wheel to let you do this while the flame is burning, but I’ve never seen this feature on a mini-lamp or oil candles (disposable oil lamp). Others, like the one pictured above, will require that you blow out the flame, adjust the wick, and try again, although I have had luck simply tapping the wick down (with an instrument, not a finger).
A flame should be large enough to produce the heat necessary, but small enough so that it doesn’t flicker or smoke too much.
PROCEDURE: You take a dry, waxed egg, and hold it to the side of your oil lamp’s flame. DO NOT ever hold the egg over the flame, because soot will deposit on the eggshell. Wait until the wax looks wet (only a few seconds, usually) and wipe the wax off with a clean, folded piece of paper towel. Try to always use a fresh section of the towel (or a new towel) for each wipe, or else you'll just be rubbing wax all over the egg, and it will take a lot longer to finish your egg.
Repeat section by section, until all of the wax has been removed. If there are any small smudges of wax remaining, you can choose to remove them with Mineral Spirits or Goo Gone.
If you have acrylic nails, or long fingernails with nail polish on them, be very careful when working near an open flame. It is quite possible–and easy– to set your nails on fire, particularly the thumb. Do not let your nails get too close to the flame!
If you have long hair, and especially long bangs, tie it back when working with open flames. Hair can easily fall into the candle flame and go up in a puff of smoke!
The advantages of using an oil lamp are that its height remains constant, the flame remains steady, and it does not drip or sputter. It is easy to refill, and will last for thousands of hours.
The disadvantages are that small, compact oil lamps are hard to find, and knocking one over can cause an oil spill which, if the lamp is lit at the time, can cause a large fire. These lamps should NOT be used by small children, even with adult supervision. Be very careful with them, and do not overfill them.
PROBLEMS: The two main problems with this method are the possibilities of soot deposition (remediable) and scorching (not remediable).
What is SOOT? Sometimes the fuel (oil) molecules don’t burn up completely. They clump together to form particles called soot, which can deposited on the surface of your egg.
SOLUTIONS: How do you get rid of it? If there is a lot, is might be worthwhile to drip some candle wax (using the stylus or the candle itself) onto this area. Let it cool, and then just heat and rub with the paper towel as you did before. The soot particles will dissolve in the wax and be removed when you remove the wax. You may have to repeat this a few times if there is a lot of soot.
Solvents will help, too, but, in my experience, they are better used for small amounts of residual soot rather than large depositions.
For more detailed discussion and instructions, go to this page.
What is SCORCHING? Scorching occurs when you hold the egg too close to the flame and actually burn the cuticle. The cuticle is made of protein and, like other proteins (hair, wool) will burn when heated too much. The black or brown areas of scorching are charred/burned egg, not merely some foreign substance deposited on the egg.
SOLUTIONS: There are none. Once the damage is done, it is done. Avoidance is the only successful strategy.
Back to Main Wax Removal page
Back to Main Pysankarstvo page
Removing the Wax with an Oil Lamp
