Basic Steps 3:
Dyeing

The Basic Steps: How to Write a Pysanka
Dye your egg:
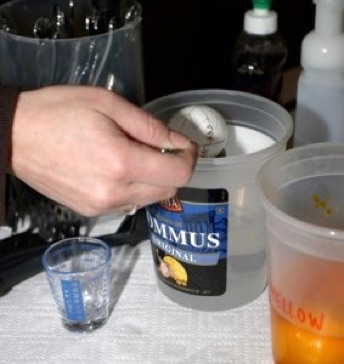
Clean and acidify your egg with a mixture of diluted vinegar––dip the egg in a jar of the “vinegar rinse” (about 2-3 tablespoons vinegar to one cup of water). Let is soak until tiny bubbles start for form on the surface of the shell. Pat the egg dry–– never rub. DO NOT leave it in more than a few minutes, or the acid in the vinegar can begin to dissolve the shell and destroy the cuticle.
Make sure to put the egg in this vinegar rinse ONLY before dyeing the egg in the first color. This will remove debris from the surface of the egg, acidify the shell, and prepare it for dyeing. You do not need to repeat this before applying other colors (unless you’ve bleached or, in some other manner, alkalinized the pH of the egg shell).
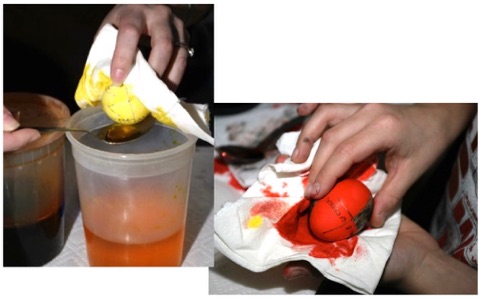
Dye your egg. After applying the wax for a color, double check your egg to make sure you didn't miss any lines. Once you have checked, dip it in the next dye stated. Leave the egg in about 1 to 5 minutes, or until it is the desired brightness.
Remove the egg with the spoon, and gently dry with a paper towel. It’s best to grab the egg from the spoon with a paper towel, rather than dump the egg and all the dye in the spoon onto the paper towel....and your hand.
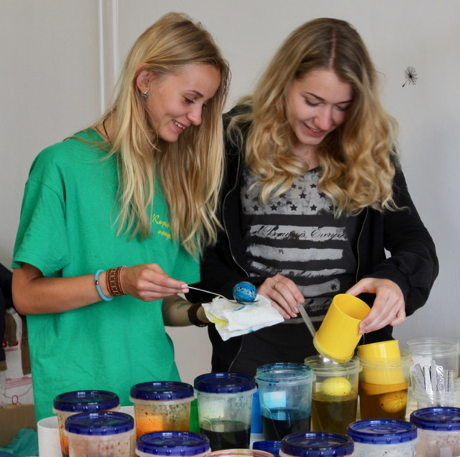
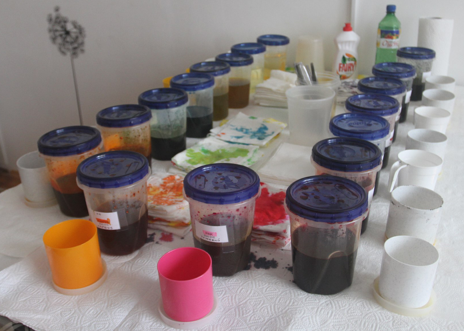
Remember, the dye sequence is from light to dark. I like to arrange dyes in the sequence that eggs will be dyed; this is an example of such a dye table from one of my classes.
Do not leave the egg in too long, or the dye will begin to seep under the previously applied wax and ruin the egg. If the color hasn’t taken in five minutes, the shell is bad, and it probably won’t. (Exception: brown eggs have a shinier shell, and may take longer to dye. Also, sometimes the final color may take a few extra minutes to get an even, dark coat.) Leaving an egg in too long risks seepage and scoring/etching of the shell by vinegar.
Dyes and color sequences:
In traditional pysankarstvo, eggs were dyed in set sequences, beginning with the lightest color, and ending with the darkest. Most traditional pysanky had only white plus two or three colors, including the final background color. The were often yellow/gold, red and brown/black. Small amounts of other colors, like green, might be added by spot dyeing.
(1) White is the first color in most eggs. If brown eggs are used, this (brown) will be the first color, and it will affect all of the following colors. Brown eggs can give interesting effect, but white eggs should be used when first learning the craft.
(2) Light Blue, if needed in very small amounts, is added next. It is dabbed on with a Q-tip of small brush, a toothpick, or small drops can be placed with a syringe and blunt needle. This is called “spot dyeing.” The yellow will remove the light blue.
(3) Yellow is used in almost all eggs. It is the base color; if the yellow does not take well, none of the other dyes will, either. Leave it on a bit longer than the other colors – three minutes at least. Gold can be used instead for a deeper, richer color.
(4) Light blue, if needed in larger quantities (more than a few dots) is applied now. Light blue will cover the yellow completely; it may or may not cover Gold.
(5) Light green, if needed, is applied next, either with a Q-tip (as above) or, if larger amounts are called for, by immersion.
(6) Orange follows; it is a “rinse” color, meaning it will remove darker colors and thus can be used as a rinse. I keep two jars of orange around; the first to rinse the eggs (it will get dirty and muddy), and the second to apply the orange color.
(Note: this “rinse” effect applies to orange dye made and sold by the Ukrainian Gift Shop (UGS). Other brands of orange, particularly those requiring vinegar, may not have this effect, and pumpkin does not.)
Pumpkin, a newer color, gives a bright, reddish-orange color. Unlike orange, it is a vinegar based dye, and is worth trying in those cases where the orange dye takes poorly (or to make jack-o-lantern pysanky). Do note, though, that it CANNOT be used as a rinse, as it contains vinegar.
(7) Red is usually next. If using UGS dyes, Scarlet will give you an bright, orangey red, while Red will give you a deeper color. DO NOT leave long in UGS Red, a sit can get very dark very fast. I use “Red Mix,” a blend of the two, one pack of each in two cups water, for a drop-dead gorgeous red color
(8) Black, brown, dark red, violet, dark/royal blue, dark green, or brick can be used as final colors. Note that not all final colors work with all color schemes. Royal blue, if used with anything but blue colors, will often give a muddy purple. Dark Red works best over orange or red.
If all else fails, dye the egg black. For some reason, even the worst eggshell seems to do well in black. Blotchy brown or purple or dark red eggs will turn a nice even black.
Do keep the egg in the final color a bit longer, until the shell is evenly and darkly covered. Don’t leave it in too long, or forget about it for hours, as the dyes will eventually start to seep under the wax, and the vinegar in the dye can weaken and erode the eggshell.
IN SUMMARY:
A simplified scheme for beginners is
White –> Yellow/Gold –> Light Blue –> Light Green –> Orange –> Red (Scarlet, Red or Red Mix) –> Final Color
This is a color sequence for UGS dyes; by no means should you ever use all the dyes in this sequence. This merely gives you an idea of which dyes come in what relative order.
White –> Yellow/Gold –> Light Blue –> Light Green –> Turquoise –>
Orange –>Brown (if you want it lighter) –> Brick (if you want it lighter) –>
Pink –> Scarlet (Bright Red) –> Red –> Brown (if you want it darker) –>
Brick (if you want it darker) –> Dark Red –> Black
Remember, color sequence is usually from light to dark (with orange being used to switch from blues to reds). Buy a pattern book or two, and get an idea of color combinations that work, and how to sequence the colors. Experiment; you may have a few disasters, but you will also end up with some beautiful and original eggs!

You can download a previous .pdf version of this page Basic Steps 2.pdf. Please feel free to print it out and share it (e.g. classes). If you wish to reproduce this content in a publication, or on another web site, please ask.
Web page updated 2-21-2019
Note: All photos, illustrations and text © Luba Petrusha 2007. All Rights Reserved. Reproduction prohibited without expressed consent. May contact via e-mail (link below).


Back to Main Basics page
Back to Main Pysankarstvo page.
Back to MAIN Pysanka home page.
Search my site with Google