Emptying Eggs

A pysanka was traditionally left full and allowed to dry up over time. The source of the pysanka’s magic was not just in the designs, but also in the egg itself. If you plan to use your pysanky to protect yourself from demons and evil, you shouldn’t empty it.
If you wish to varnish your pysanka, or keep it for longer than a year or so, you should empty it. It is much easier to empty the egg while it is still white--you don’t have to worry about splattering egg on the dyed surface, or even having the egg crack or blow up on you. However, dyeing it becomes a more involved procedure (egg has to be plugged, weighed down, etc.).
How to empty
There are essentially two ways of emptying an egg. The two hole method is the traditional one: make a small hole in either end of the egg; blow air into one hole, and the egg contents come out of the other. The one hole method is a newer one–a single, larger hole is made, and air is forced in through it via a needle. The egg contents stream out around the needle.
Two-hole method: The traditional way of emptying an egg is to make two holes, one in each end of the egg, and then to blow out the contents.
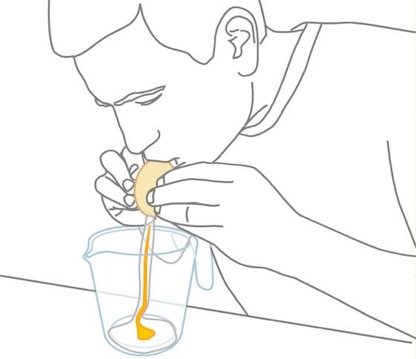
You can blow out the contents as shown above, or by using a straw (to keep your mouth off of the egg itself) or other tools. Step by step instructions can be found here. I used to blow out my eggs this way, but came to prefer the one hole method.
There is a tool available for blowing out eggs through two holes, Aunt Marge’s Egg Blower:
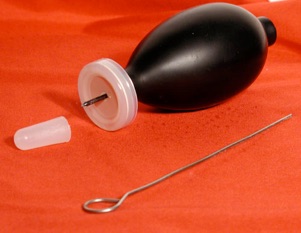
This video shows how to use it. My one note is that picking at the sides of the hole to enlarge it does not work well. Use the tip of a small screwdriver or nail file to do this (see below), or a dremel tool.
You can also use an ordinary nasal syringe, as is shown in this video.
One-hole method: In this technique, a single hole is made in (usually) the larger end of the egg, and the contents are removed via that hole. When I first began doing this I used a syringe to suck out the contents, then would inject water, shake up the egg, and suction out the rinse. It was time-consuming but gave a nice result.
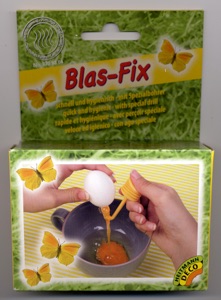
The I discovered the Blas-Fix, a clever little German device which made egg-emptying a breeze. It is a small plastic bellows attached via an angled plastic arm to a needle:
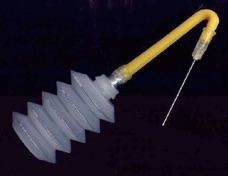
The photo on the right shows the version I use, which has had the original bellows replaced by a heavy-duty carpenter’s glue applicator purchased from Lee Valley Tools. I have found that, if you to empty large numbers of eggs, the original bellow wears out and cracks rather quickly.
Unfortunately, the Blas-Fix is no longer being made. People have fashioned replacements using the glue applicator and straight or bent needles; they work similarly. The hand drill can be replaced by a very small screwdriver; others use a Dremel tool.
Some people now use aquarium pumps and wash the egg contents out through a single hole; the disadvantage of this method is you can’t save the egg contents. I freeze the innards and use them to make Bailey’s Irish Creme; you can also save the contents to make omelets or other eggy delights.
The following instructions show a white (undyed) egg being emptied with a Blas-fix.
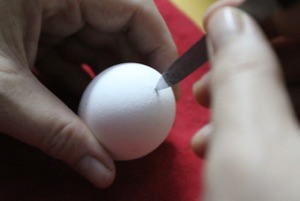
Step 1: Make the hole. If using the Blas-Fix, this is most easily done by using the small hand drill included. It makes a perfect sized hole. Holding the egg firmly in one hand, press the point of the drill against the end of the egg until you feel it give just a bit. This will seat the drill, Once it is seated, turn it rapidly to drill the hole.
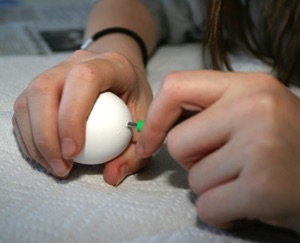
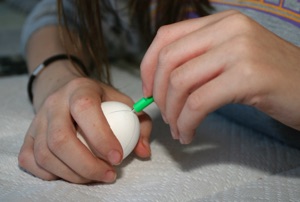
Pressing the point of the drill into the egg (left) and drilling (right)
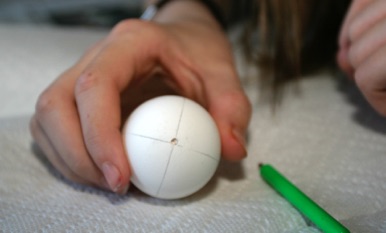
A perfect hole
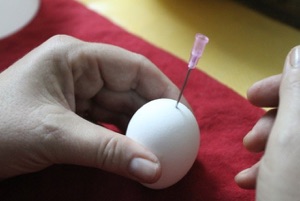
If not using the Blas-fix, you can use a thumbtack or syringe needle to make a small, initial hole, and then use the tip of a small Phillips screwdriver or a nail file to enlarge the hole (by rotating it like a drill). DO NOT use something sharp, like a knife, to do this--it will catch on the edges of the drain hole and cause cracking.
Alternatively, if you have access to Dremel tool, it can be used to make perfect holes with the grinder attachment.
Step 2: Evacuate the egg contents. If using the Blas-fix, insert the tip into the egg and, while holding the egg over a bowl or other container, pump air into the egg. This air will displace the egg contents, which will stream out around the needle into the bowl. Usually the white will come out first, followed by the yolk. If the yolk does not come out readily, you will need to use the included long needle to insert into the egg to break up the yolk a bit.
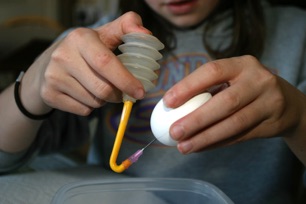

Inserting the needle (left) and pumping out the egg white (right)
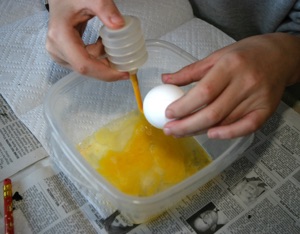
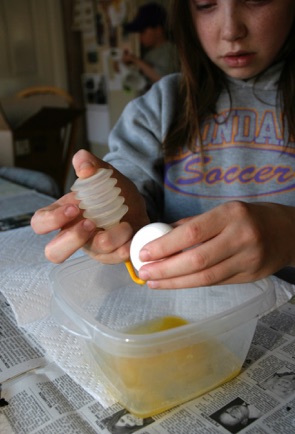
The egg yolk come out a bit later
WARNING: Do not wear nice clothing, or consider an apron or other covering when emptying eggs, as blockage from the internal membrane can redirect the spray into unintended directions (i.e. onto you).
If you are using a syringe, gently suck out the egg contents into the syringe (10 cc minimum), empty it and repeat until no more comes out. As with the Blas-fix, you may need to use a long needle to break up the yolk a bit.
And if you’re feeling McGyverish, here’s a video showing to how to empty an egg with a syringe while making a mess.
Step 3: Rinse out the egg. Inject 20 to 30 cc of water into the egg with a syringe. Cover the drain hole with your thumb, and shake the egg well. Then use your preferred method (Blas-Fix, etc.) to drain the water out.
Step 4: Dry out the egg. This may take a few days, but it is important to make sure the egg is fully dried out before sealing it. See detailed instructions at the link.


Back to Main Preparations page
Back to Main Pysankarstvo page
Search my site with Google
Removing the Egg White and Yolk