Inspecting Eggs


What do you look for when inspecting eggs prior to writing pysanky? A number of things, actually. Some of these can be seen quite readily:
-
1.Shape You want an egg that is egg-shaped and reasonably symmetrically so. Discard any irregularly shaped or asymmetric eggs. Eggs that are regular but oddly shaped (very long or very round) may not be suited to the particular design you have selected, so be wary.
-
2.Surface irregularities Avoid eggs with lots of bumps or ridges on the surface, or odd crevices or “stretch marks.”. A small bump or two can be worked around, but it is difficult to apply a design to a badly pocked egg. Such eggs are hard to write even lines on, and a very bumpy surface has an unpleasant texture.
-
3.Surface texture Look as the surface, assessing the finish and pores. A satin-like finish is best, and will usually absorb dye nicely. A shiny surface may not; eggs with a glossy surface will usually not take dye well. Avoid eggs with deep pores, selecting for those with small, barely visible pores. Similarly, very chalky surfaces may also dye poorly. Look for eggs with a nice, even matte finish.
-
4.Discoloration of shell Pay attention to discoloration of the shell. Odd colored eggs (e.g. blue or green Araucanas) may be fun to work with, but dyeing them might result in odd colors. Eggs with small discolored patches should be avoided, for this might ruin the symmetry of your designs. Red stamps from the egg producer can be removed with a Magic Eraser or similar product; test dye an egg after removing the mark to make sure the surface hasn’t been damaged.
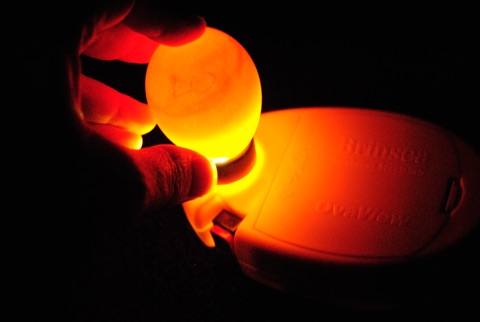
For other things, you really need to candle the eggs. This is done by holding the egg up before a bright light and looking at it. The egg will light up, and defects in the shell can readily be seen:
-
5.Cracks Look for both big, obvious cracks (which can often be seen without candling) and small hairline cracks that can easily be missed if you don’t candle. Set aside eggs with any cracks at all; they are “eaters.” Even tiny cracks can manifest themselves while you are removing wax from and egg or blowing out the contents.

-
6.Weak spots Avoid using eggs with large translucencies in the shell. All eggs will have some thinner areas, and some eggs light up like the night sky when you candle them.


In pysankarstvo we candle eggs for a different reason, although it would be good to know if there was a chick inside an egg we were planning to write a pysanka on. But no, the main reason for candling is to look for cracks and weak spots in the shell. While most cracks can be spotted with the naked eye, it is easy to miss some of the finer ones. If you are working on full eggs, you might not find a small crack until you were heating the egg to remove the wax, or emptying it.–a true tragedy, all that work down the drain. If you work on emptied eggs, it’s nice to find the crack before the egg explodes in your hands while trying to empty it.
Cracked eggs can go directly into the egg bin in your refrigerator, and be enjoyed for breakfast, rather than making a huge mess in your studio.
If you don’t write many pysanky, a candler is not really worth buying–it is easy to candle an egg in front of a powerful light. But if you write a lot of eggs, or teach a lot of classes, and candler is well worth it, just for the protection it affords your eyes.
Since I don’t possess X-ray vision, I use a Brinsea Ovaview egg candler, pictured here:

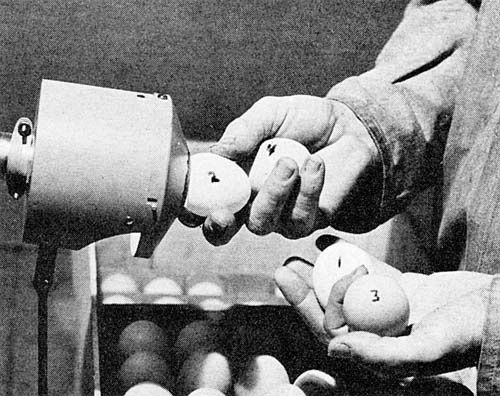
It is available on line from poultry suppliers as well as Amazon, and much more convenient than traditional X-Ray vision devices (above right). You simply place an egg on the plastic cup, push a button, and the egg lights up. Working in a darkened room is necessary to see embryonic development within the egg (picture below), but not for seeing cracks, which are much more easily spotted.

Back to Main Preparations page
Back to Main Pysankarstvo page
Search my site with Google
Inspecting Your Eggs
A commercial egg candling apparatus


