Snowflake Pysanka
Step-by-Step: Finishing
Snowflake Pysanka
Step-by-Step: Finishing

VARNISHING: Varnish as you normally would. I use either Varathane or Minwax clear gloss polyurethane varnish, and apply one or more thin coats. I apply the first coat before emptying out the egg, and the rest after I have drained it and the inside has dried out nicely. This will result in a very glossy egg.
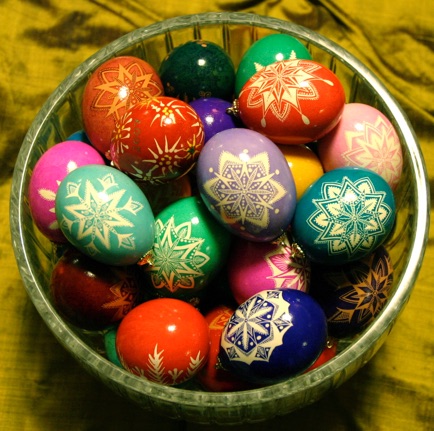
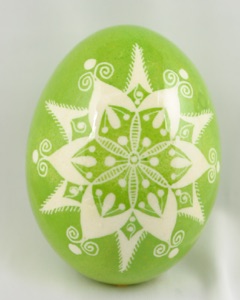
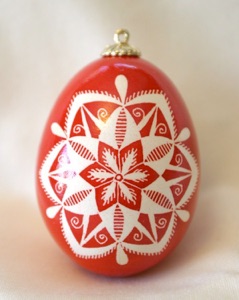
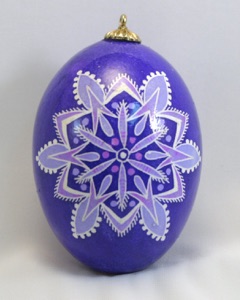
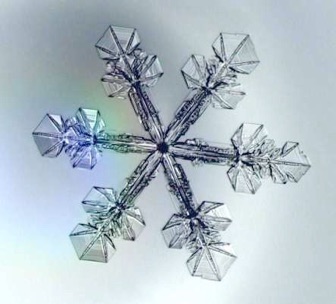
These eggs are examples of the snowflake pysanka demonstrated earlier in this section; note the different effects with a different final color:

ORIENTATION: You must choose which orientation you want for your snowflake pysanka, as where you drill the drain hole depends on how you wish the ornament to look. If you want it to resemble an egg (below, left), drill it in the small end of the egg; if you wish it to look more ornament-like (below, right), drill it in the bottom (large end) of the egg.
nnHole on topnn n Hole on bottom
EMPTYING: Empty as you normally would. Let the egg drain, making sure it is entirely dry. Then either add additional coats of varnish (as describe above), or attach the finding.
FINDINGS: After varnishing and draining the eggs in the usual manner, I glue small “findings” to the tops in order to hang them. Note that one difference in snowflake pysanky is that the hole is sometimes made in the top of the egg, instead of the bottom, depending on the final orientation you desire. Glue the finding over the drain hole, once the egg is thoroughly dried inside, so that there will be no visible hole afterwards.
I use findings (chicken egg sized) from the Ukrainian Gift Shop. They recommend using tacky glue to attach them, but I prefer super glue gel. I’ve tried using the tacky glue they recommend, but it is slow to dry and the findings often slide a bit (you can see crooked ones on a few of the pysanky). I find that super glue gel is much easier to use, dries faster, and holds better.
INSCRIPTIONS: On some ornaments, the same pattern is repeated on both sides. On others, I draw a snowflake on one side, and leave the other side blank. On the latter I will, after varnishing, write the year with a gold or silver marker (Sharpies are best).
If a snowflake pysanka will be a gift, particularly if it will be a gift for a younger child, I will often write the recipient’s name on the egg as well.
Back to MAIN My Pysanky page.
Back to MAIN Snowflake Pysanky page.
Finishing Your Snowflake Pysanka