Pysanka-Making Supplies:
The Basics
Pysanka-Making Supplies:
The Basics

Basic Supplies:
What are the most basic items that you will need to make pysanky? There aren’t really that many, and they’re fairly inexpensive.
Clean, raw EGGS at room temperature. The eggs should be carefully checked for cracks; this can be done by “candling” them (examining them in front of a light or candle).
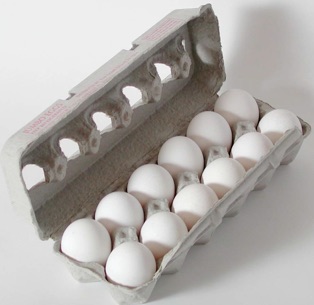
The eggs should be at room temperature; if they are cold, the wax will not stick properly, and the eggs will “sweat” (water will condense upon them), ruining the look of the dye. Luba Perchyshyn suggests using only eggs that have been at room temperature for at least five days, but a few hours will usually do. Overnight is best. Even warming eggs with warm water to rapidly bring them to room temperature will do in a pinch.
The eggs should be raw––cooking them damages the shell, and the dyes will not take properly. Some people prefer eggs that have been emptied and the holes plugged with a bit of wax. Such eggs will float in the dye instead of sinking, and must be weighed down. A sturdy plastic drinking glass, partially filled with water, works well for this (or for older eggs which have evaporated a bit).
It is also possible to use emptied eggs which have been properly prepared: drained, washed, dried out, and closed with a plug (wax or silicone).

To learn more about dyes, go here.
If you wish to find out more about the chemistry of aniline dyes, click here to go to the “Chemistry of Pysankarstvo” section.
SPOONS. Necessary for dyeing the eggs. I buy sets of four two metal tablespoons at the dollar store (prices have gone up!). Big tablespoons are the best. Plastic tablespoons should be avoided, as they are not usually strong enough to safely transport full eggs in and out of the dye; they may be adequate if you only work with emptied shells.
You might also want to pick up a large plastic slotted spoon or two; these are a bit gentler on the eggs, and I use them to lift eggs in and out of my vinegar rinse (see below). On those occasions when my eggs don’t want to sink all the way down into the dye, I can also use them to hold the eggs down, although I prefer to use a plastic drinking glass (partially filled with water).
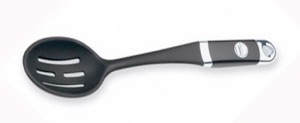
One note on spoon storage–keep the metal ones in a non-glass container. The constant banging of spoons against the wall of a glass jar will eventually break it, even a nice, sturdy jar; it is better to repurpose a plastic container (soup or CD) for this function. Also, dry them fully before setting them into the jar, otherwise they will rust.
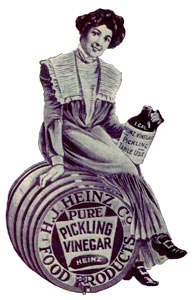
A tablespoon of dye is added to almost commercial aniline dye preparations when mixing them up. There are few exceptions any more: UGS orange is one of the few left that does not call for vinegar. In fact, this particular dye will fall out of solution into a gooey particulate mass if you add vinegar. Make sure you ALWAYS check the dye packet instructions before adding vinegar to ANY dye.
Older dyes (those saved from previous years) can be revitalized by adding a tablespoon or two of vinegar. Helen Badulak, in her book “Pysanky in the 21st Century,” suggests adding two tablespoons of dye every two weeks for colors that are used frequently. Then again, she makes a LOT of pysanky!
Another use is to mix up a vinegar “rinse” solution, which many pysankarky use to prepare the eggs before dyeing them; this is prepared by adding 2 or 3 tablespoons of vinegar to a cup of water. The eggs are soaked in this solution for a few minutes (until small bubbles form on the surface of the egg) just prior to dyeing in the first color. This does not clean the surface of the egg–that should be dome with a mild soap prior to beginning to apply the wax design–but acidifies it and makes it more receptive to dye.
Lastly, vinegar is used for etching, both to create the traditional “white” pysanky, and in more modern types of etching using brown and Araucana eggs.
I use ordinary white vinegar, and buy it in the large plastic jug, pouring it off into smaller containers for ease of use. The vinegar will not go bad, and can be saved from year to year. If you have too much vinegar, and need some ideas for how to use it up, go here.
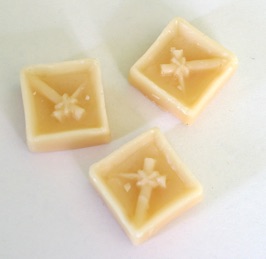
BEESSWAX. Pysankarstvo is a form of batik, and beeswax is used to write the designs. Beeswax can be bought in small cakes from most merchants who sell pysanka supplies.
Other types of wax should NOT be substituted! Paraffin and many other waxes have melting points lower than that of beeswax, and will smear or not adhere to the egg properly. In addition, unlike most other waxes, beeswax turns black when heated, making it easy to see the design once it has been applied.
The beeswax must be quite pure; that which can be obtained from beekeepers is often full of debris. This debris can clog up the stylus, making the pysanka-making process very frustrating. Make sure any beeswax you buy and use has been filtered properly.
Ultra-filtered wax presents another problem–while it flows more freely through the stylus tip and causes less clogging, it also produces wider lines. It is necessary for use in the new, ultrafine tips (X, XX, and XXX fine), but is not necessary for the normal range of writing tips.
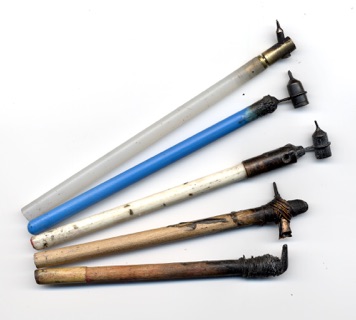
Traditional style styluses are still made, but wooden dowels have replaced willow sticks, and the cones come in a variety of tip sizes–fine, medium and wide.
Styluses are now made with more modern materials, with those made with non-flammable delrin plastic handles gaining in popularity.
An electric version of the stylus has been commercially available since the 1970s. The heater core which keeps the melted beeswax at a constant temperature, allowing for more consistently even lines.
These newer styluses (whether electric or not) sport machined heads; the cone has become a metal reservoir which holds a much larger amount of melted beeswax. The tips on these cones can be better machined, with sizes ranging from extra-fine to extra-wide in the electric models.
To learn more about styluses, go here.
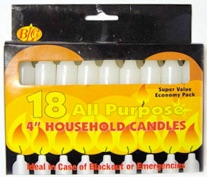
CANDLES. Candles are necessary for heating the beeswax when writing designs with a traditional stylus, and for removing the wax once done. Some pysankary like tea lights, but these can have a weak flame, and accumulate molten wax. The same is true for votives, and both are difficult to use to remove wax in the traditional manner, as the flame is harder to access.
I prefer short tapered candles. Pure beeswax candles seem to work the best– they don’t smoke as much as paraffin candles, and smell lovely. But, unless you can find a cheap source (e.g. church leftovers), they can be quite expensive.

Two other options for a source of flame are an alcohol lamp or a small oil lamp. These both have the advantage of producing a constant flame at a constant height, and they both smoke less than a paraffin candle (the alcohol lamp having the advantage here). These are definitely the better option if making drop-pull pysanky in the traditional manner (using the “can of beans, spoon and duct tape” apparatus). Small oil lamps (the disposable version of which is sometimes called a “liquid candle”) can be purchased at craft stores; alcohol lamps need to be purchased through a chemistry supply house.
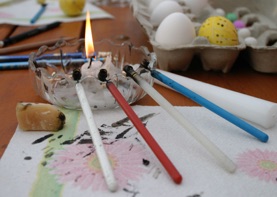
But it’s best to have something a bit more stable, so I prefer a candle holder that the candle nests into snugly, as this reduces the risk of the candle tipping over and starting a fire. Also, a nice glass candle holder gives you a convenient place to safely rest your styluses. (The candle holder on the left is a simple glass bowl with a wavy edge.)
I buy heavy glass holders at the dollar store; garage sales and rummage sales, or even K-Mart are other good sources of cheap but sturdy candle holders. But never, ever Walmart!!!
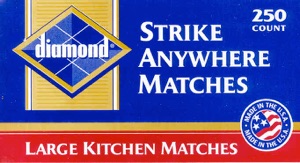
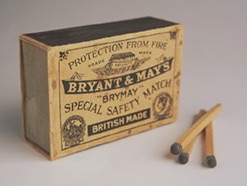
MATCHES/LIGHTER. You’ll need to light the candle. It’s good to keep these around for the inevitable re-lighting, and to melt the bottom of the candle to seat it in its holder. When teaching classes to children, it’s best to keep these in your pocket, as they serve as a very strong temptation to young boys. I prefer the old-fashioned wooden kitchen matches, as they tend to stay lit longer.
PENCIL. This is used for drawing guide lines onto the egg. There is disagreement as to whether a hard or soft pencil is best. A hard pencil––2.5 or 3––makes very light lines. A softer pencil––2––makes darker lines and smears more readily, but seems to come off more easily at the end. The pencil lines should come off when the wax is removed. (See this section for removal of pencil lines.)
That said, I’ve come to prefer mechanical pencils. They have a much finer point, and don’t need constant sharpening.


PAPER PRODUCTS. This consists of individual sheets of paper toweling at each work area, as well as folded sheets used for drying the egg after dyeing, and removing the wax (with candle), along with facial tissues used for finishing the wax removal with a cleaning solution.
Viva paper towels are my favorite for patting the eggs dry after dyeing; they are very thick and soft, and absorb the dye well. They can be reused many times over once they’ve dried.
Cheap facial tissues are perfect for the final cleaning of a finished pysanka; a few drops of Goo-Gone or mineral spirits on a tissue will remove the last vestiges of wax, soot and pencil from a pysanka. The cheap tissues are better than the fancy ones, as they contain no perfumes or lotions, and are sturdier.
Back to Main Supplies page
Back to MAIN Pysanka home page.
Back to Pysanka Index.
